Point of Sale (Cashier Guide)
Step-by-step guide for cashiers to process sales, manage tickets, handle returns, and close sessions in the Point of Sale system.
Overview
The Point of Sale (PoS) system allows cashiers to manage sales, customers, payments, and daily sessions easily.
This guide explains how to perform daily cashier operations with visual references for each screen.
1. Dashboard Overview
When you log in, the PoS Dashboard appears:
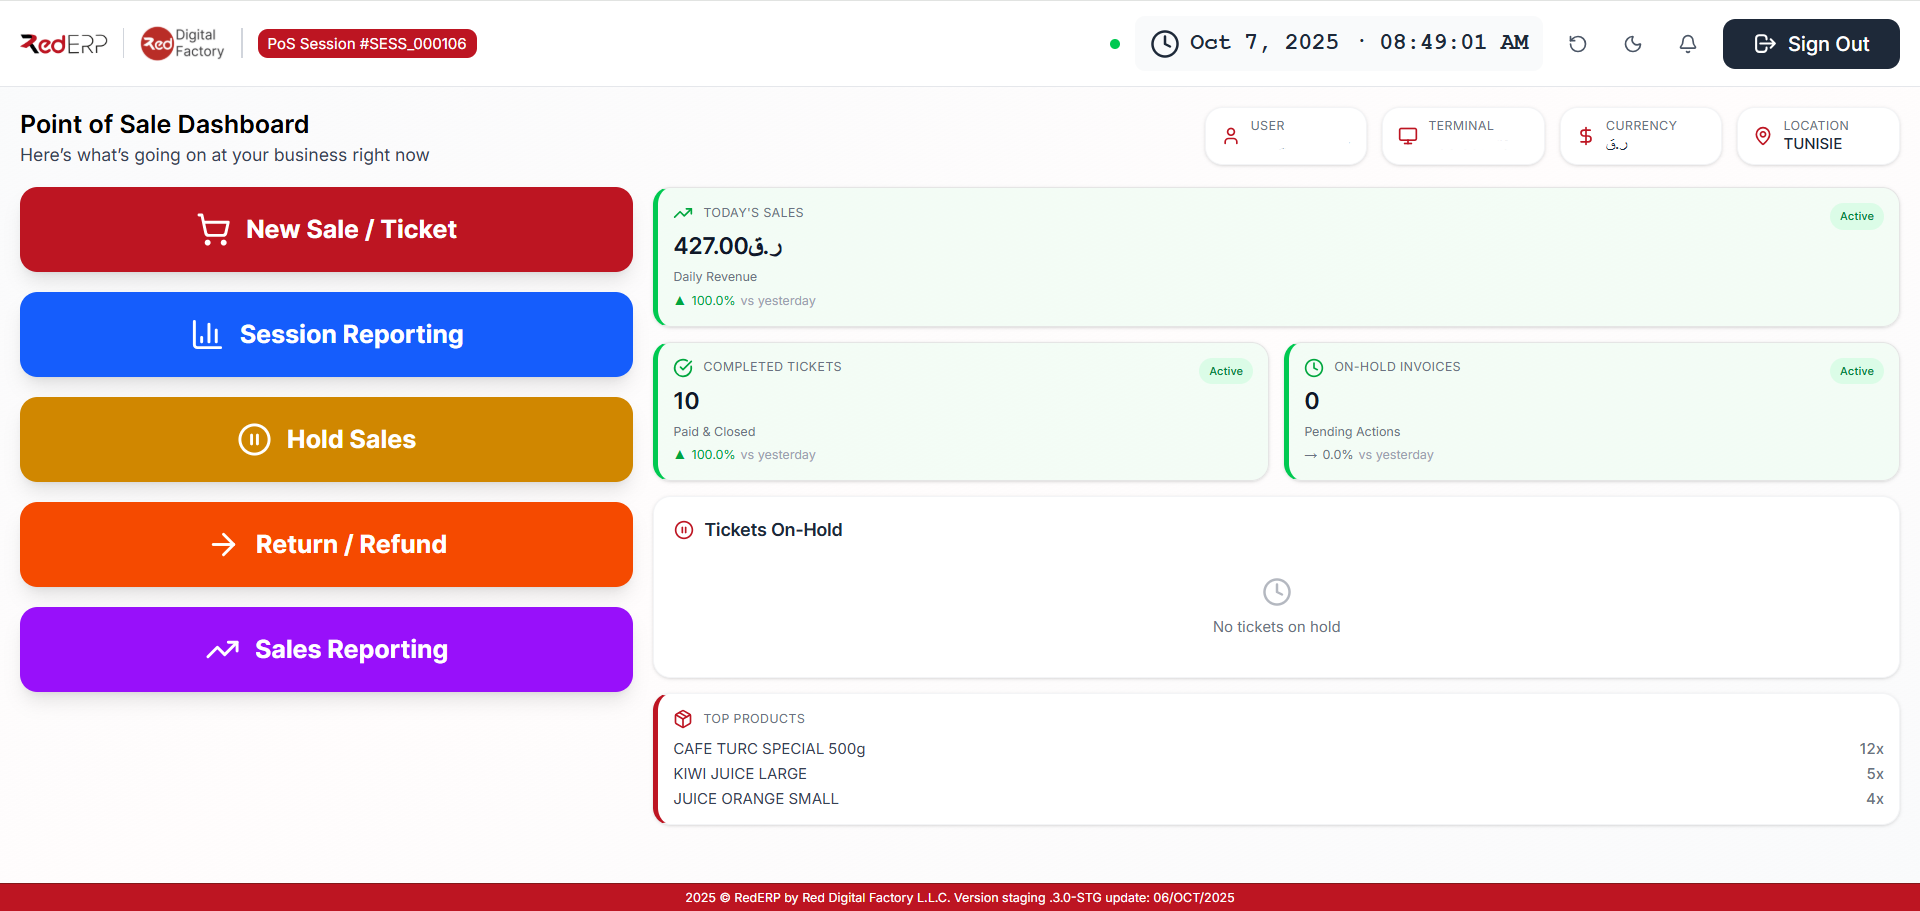
Here you can view:
- Logged-in cashier and terminal
- Current session status
- Today’s total sales and invoices
- On-hold tickets and top-selling products
2. Starting a New Sale
Click New Sale / Ticket to begin a transaction.
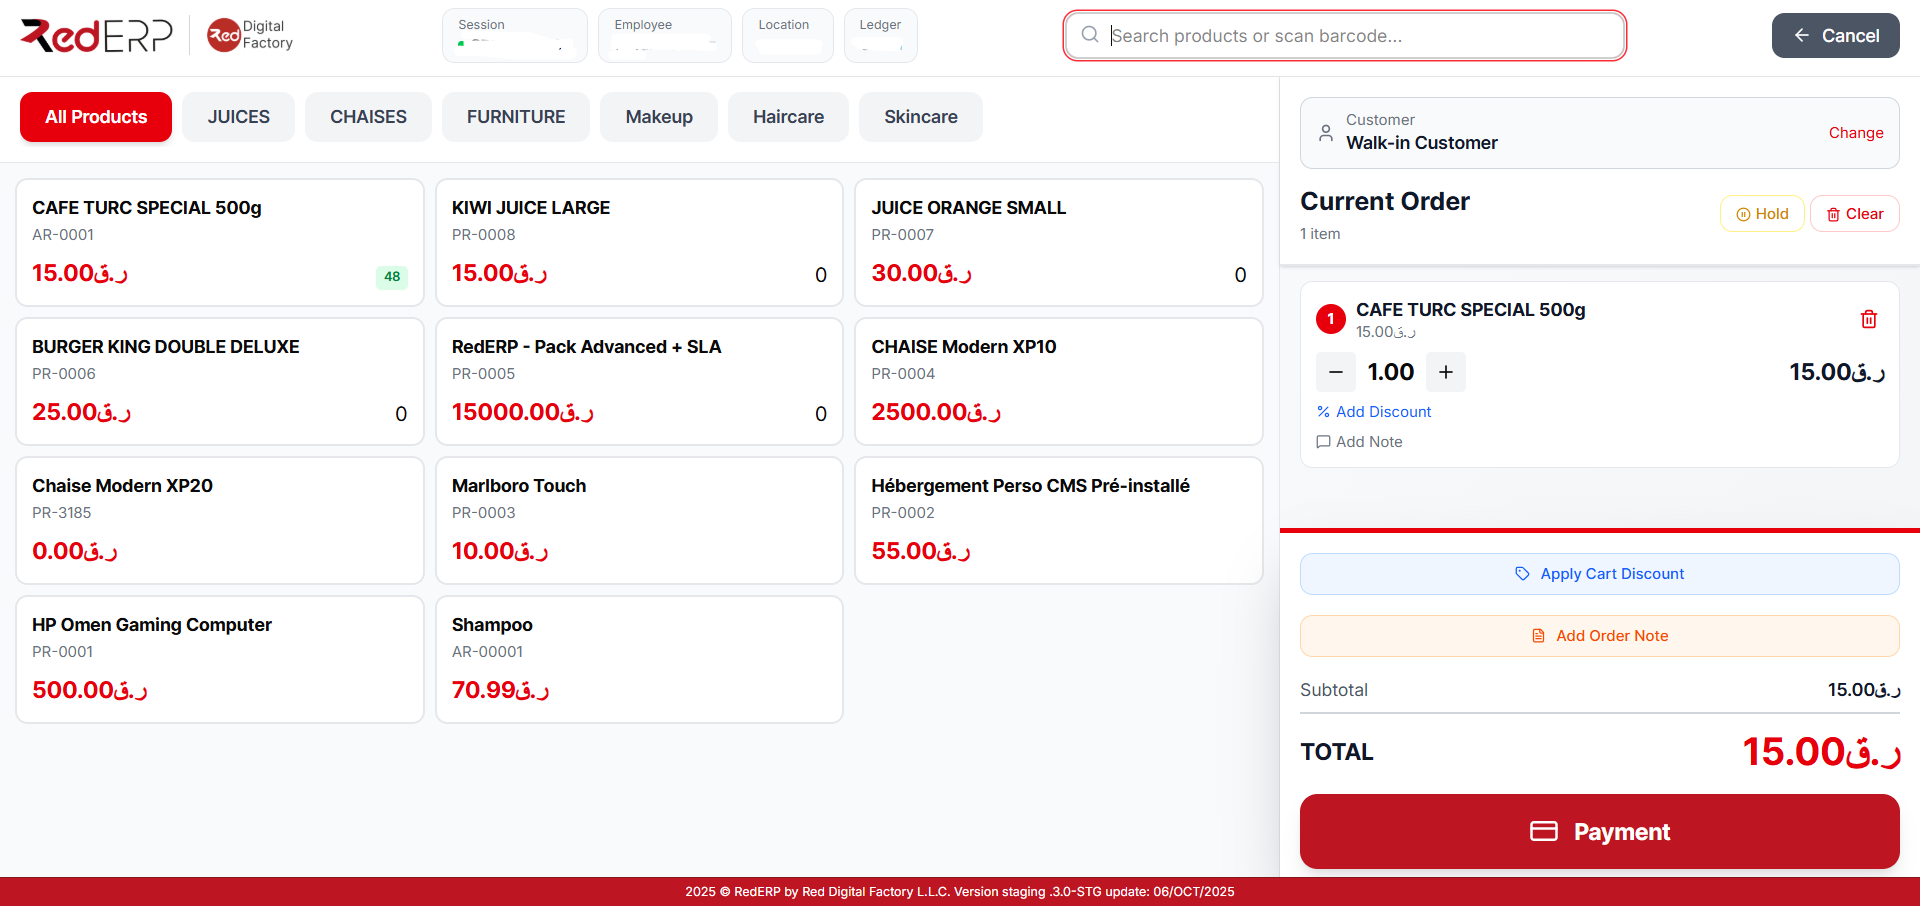
Products are organized by category. Tap an item to add it to the cart.
3. Adding Products to Cart
As you select products, the Cart on the right updates automatically.

You can:
- Change product quantities
- Remove items
- View updated totals instantly
4. Assigning a Client (Optional)
By default, sales are linked to Walk-in Customer.
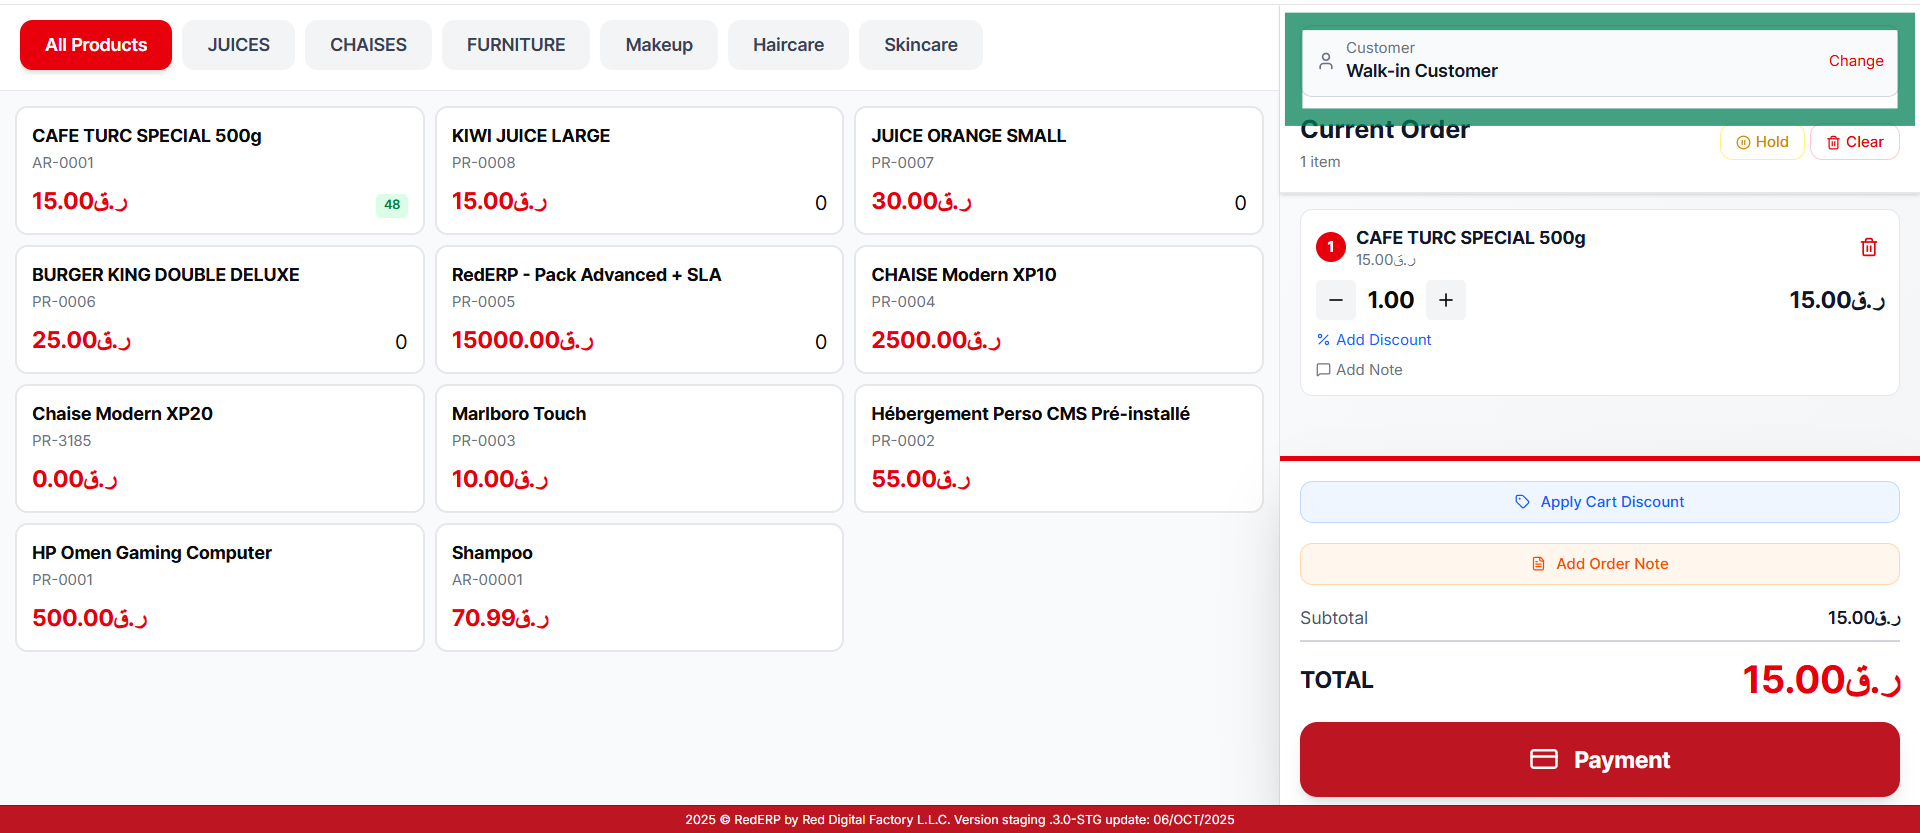
To associate a sale with a known client:
- Click Select Client
- Choose a registered client to track loyalty or purchase history
5. Proceeding to Payment
Once the cart is ready, click Payment.
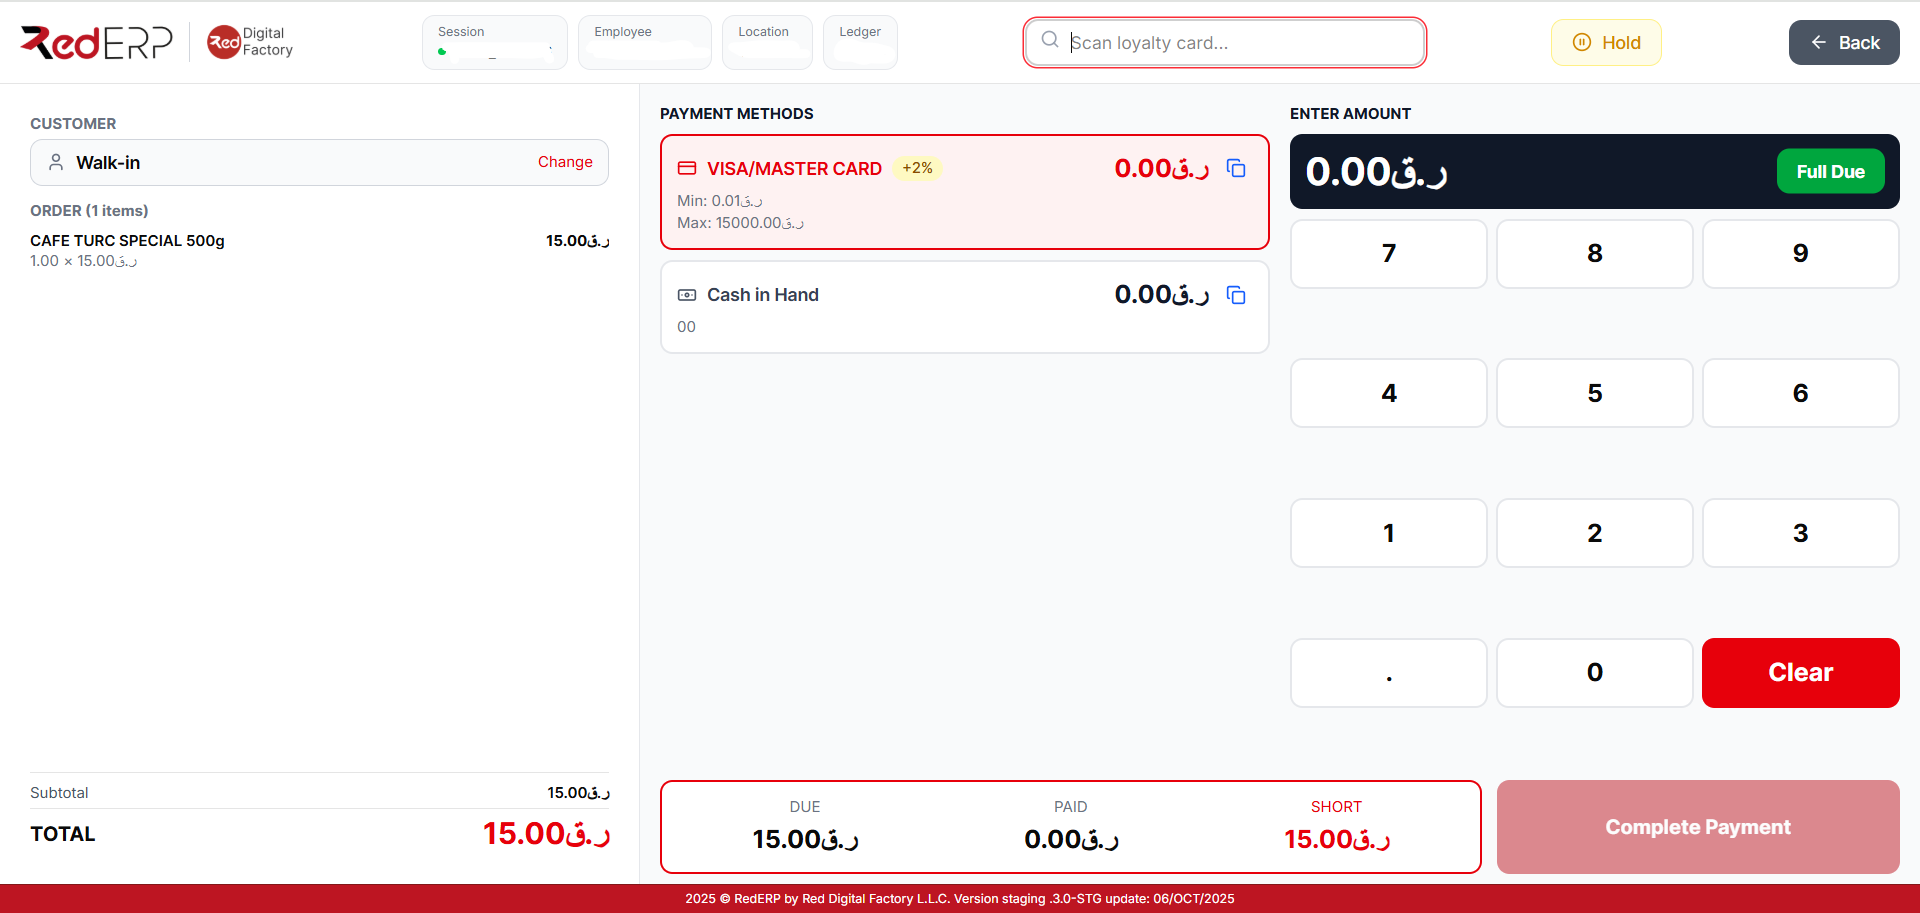
- Choose payment method (Cash, Card, Wallet, etc.)
- Enter the received amount
- Change will be calculated automatically
6. Completing the Sale
Click Complete Payment to finalize the transaction.
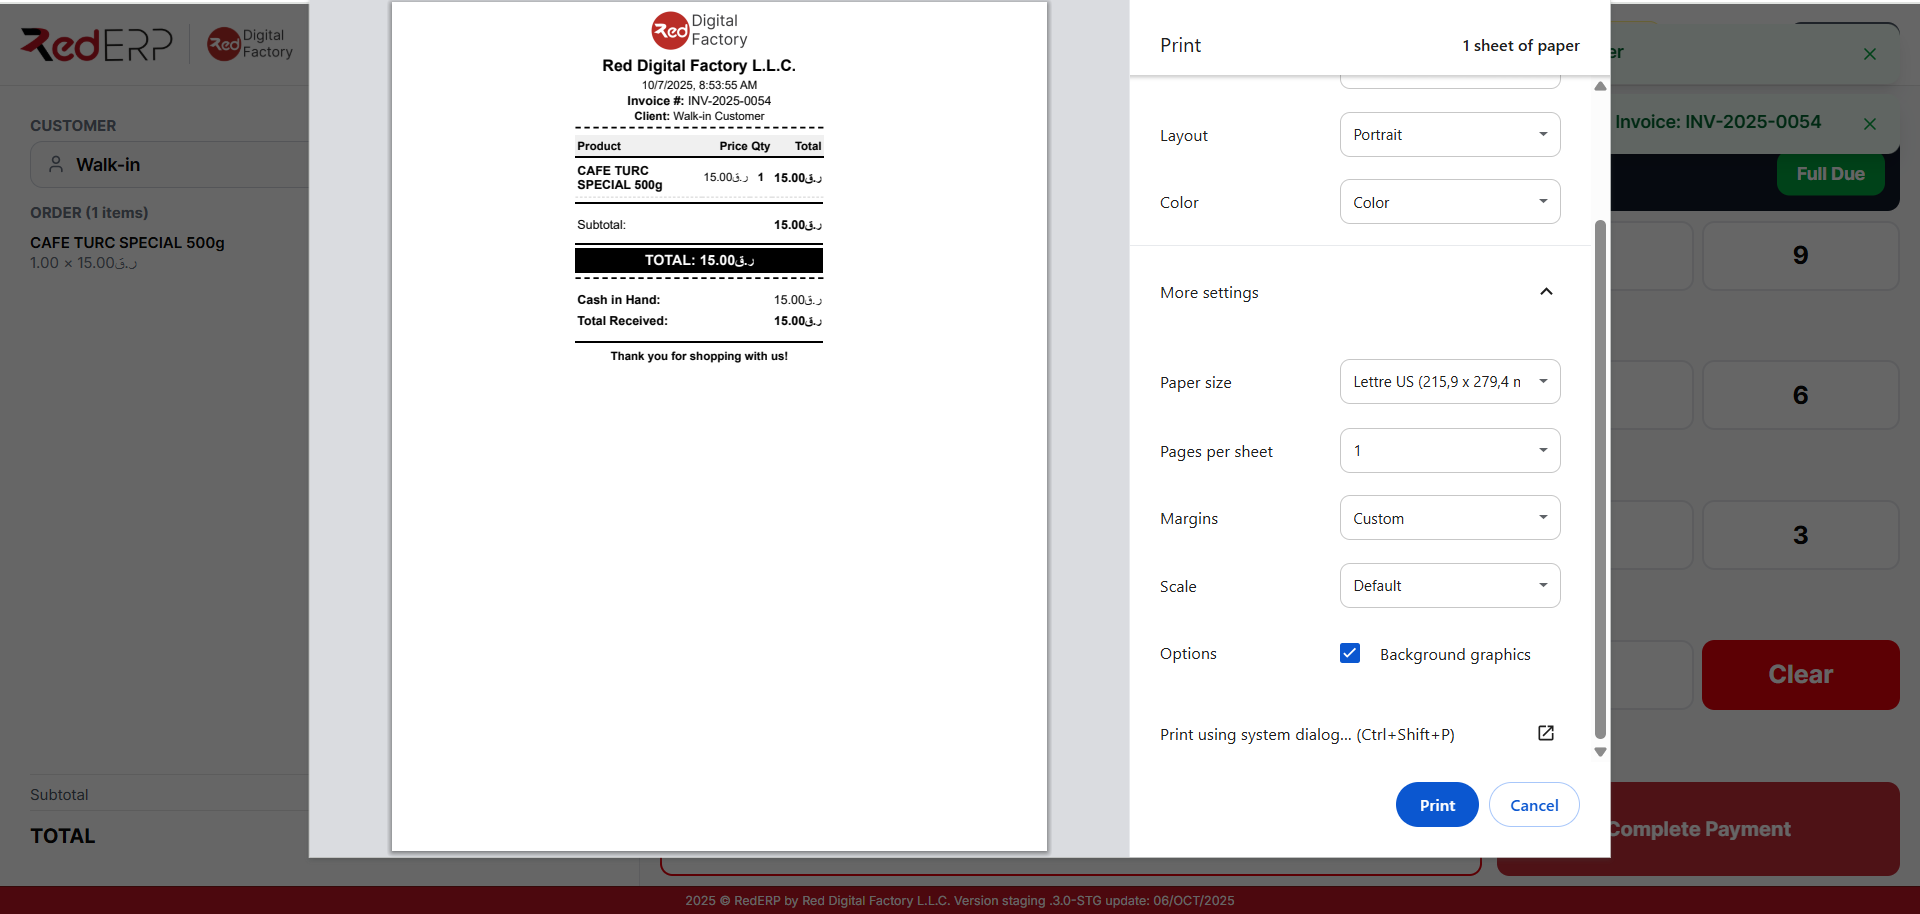
The invoice is generated and printed automatically.
The sale now appears in Completed Tickets.
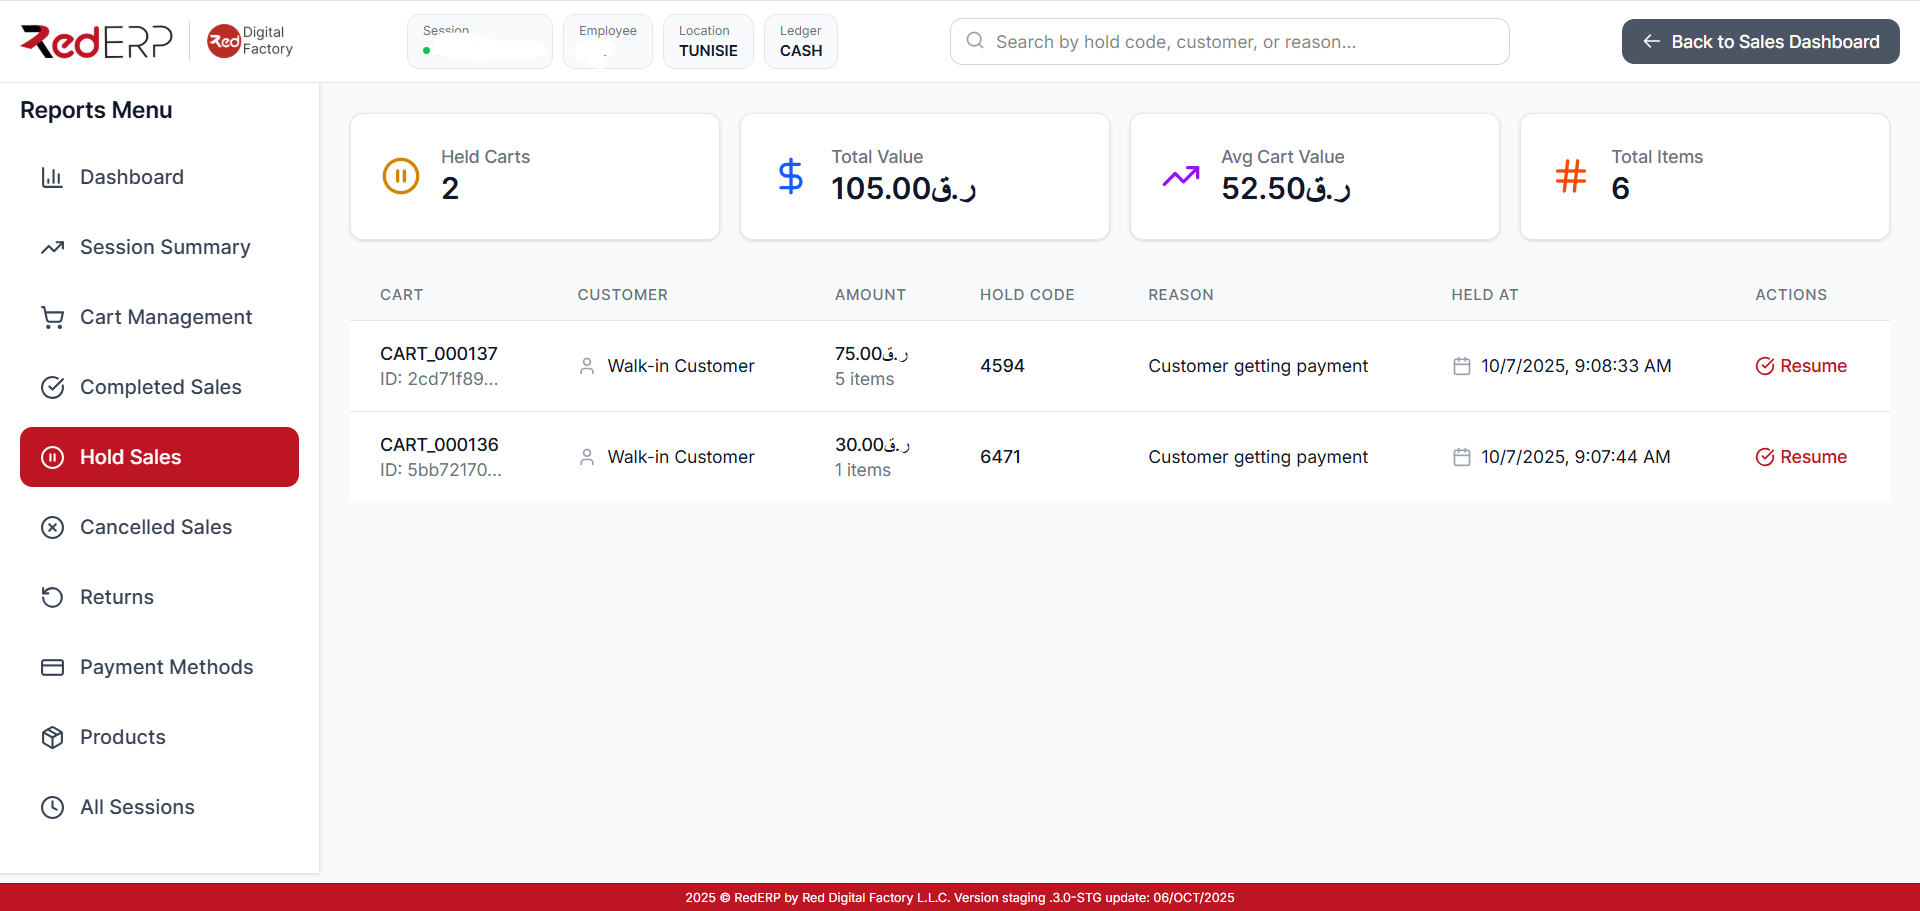
7. Holding and Resuming Sales
At any time during a sale or payment:
- Click On Hold to pause the transaction
- Optionally add a note or reason
To resume:
- Go to Dashboard → On-Hold Invoices
- Find the ticket using its code
- Click Resume to reopen the sale
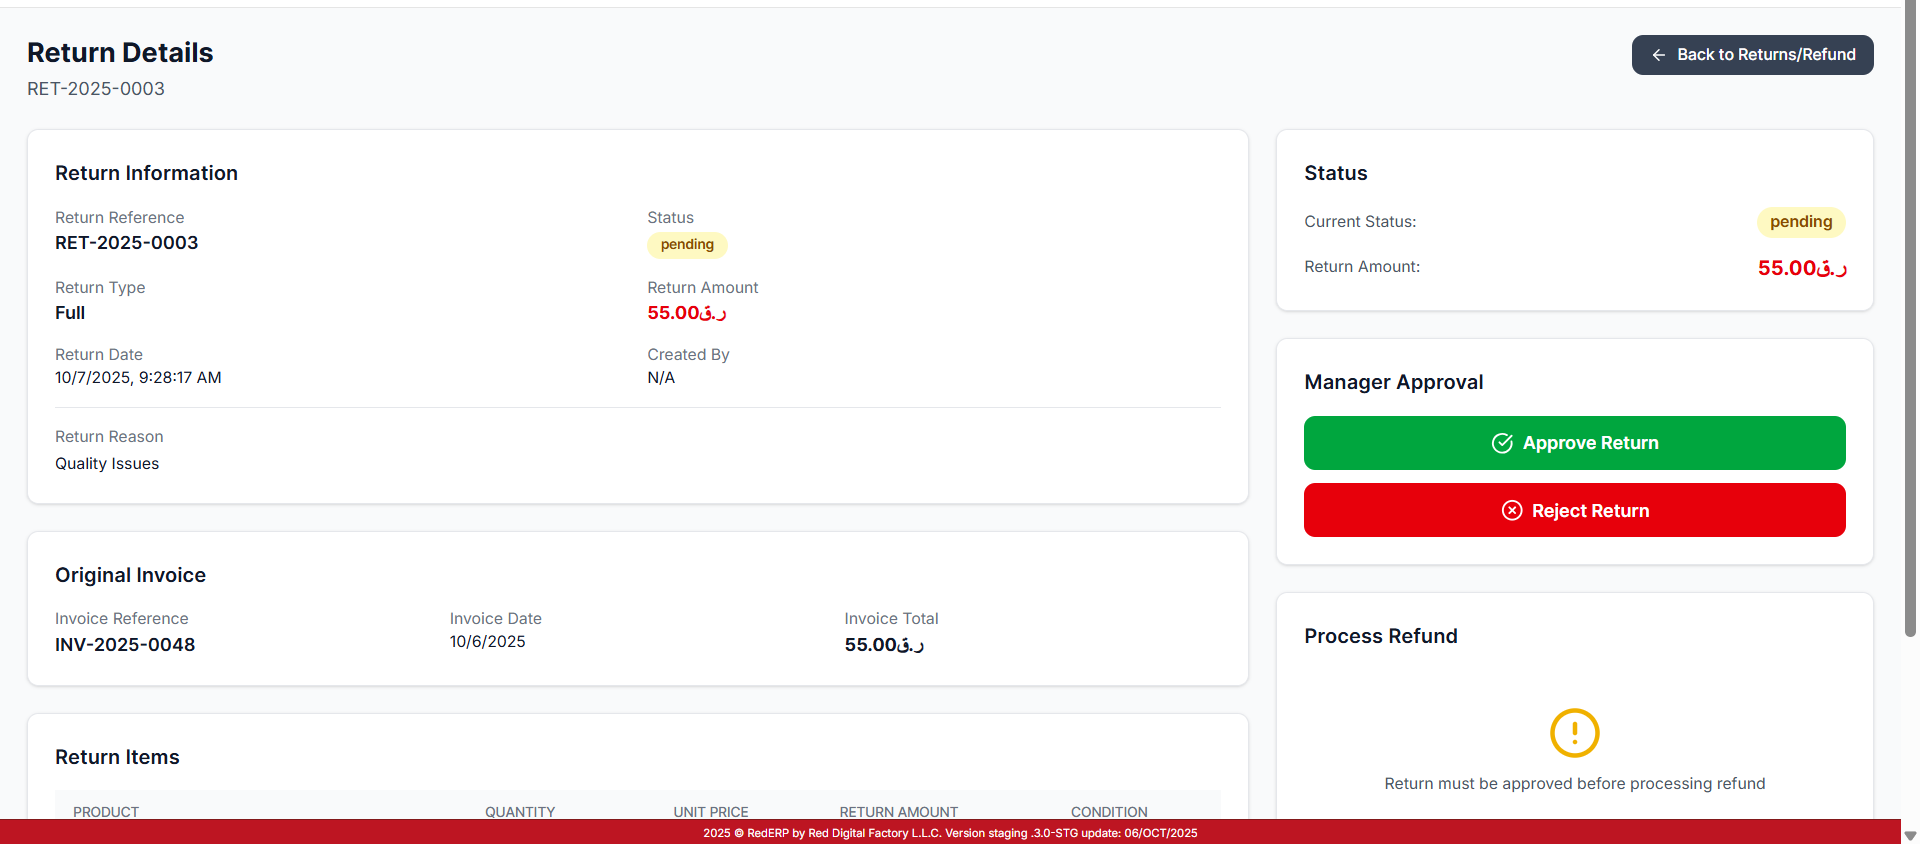
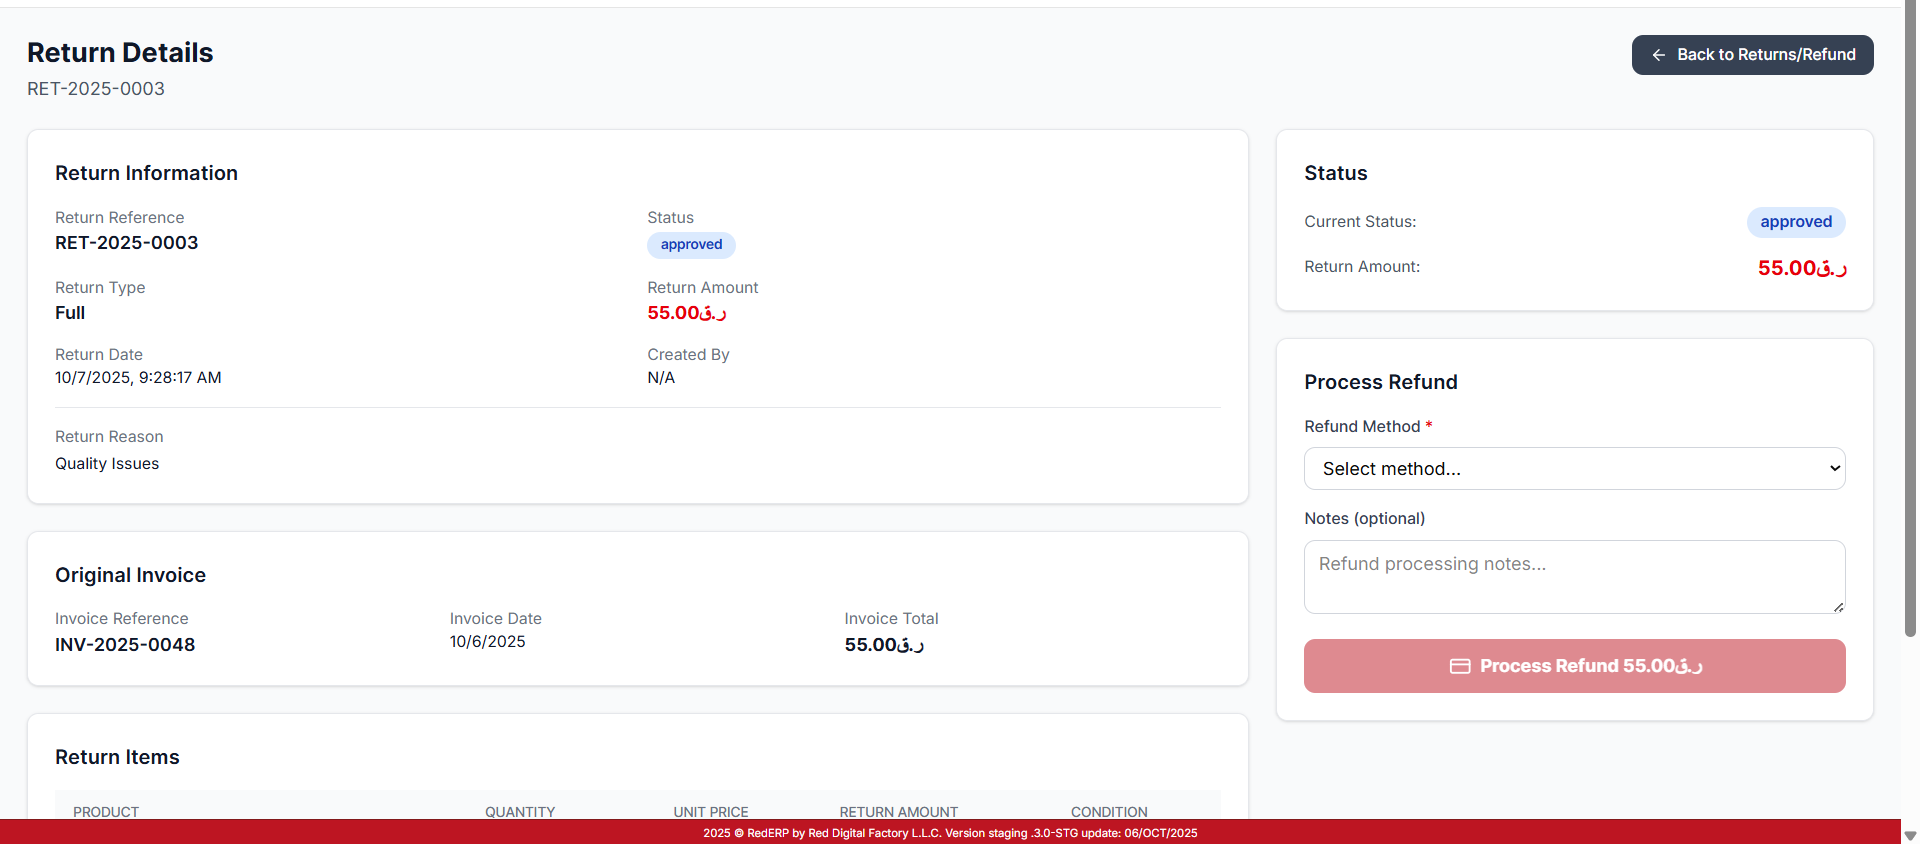
8. Processing Returns & Refunds
To process a return:
- Open the Returns/ Refunds section from the dashboard
- Enter the original Invoice Reference and click Search
- Select the invoice to open the return form
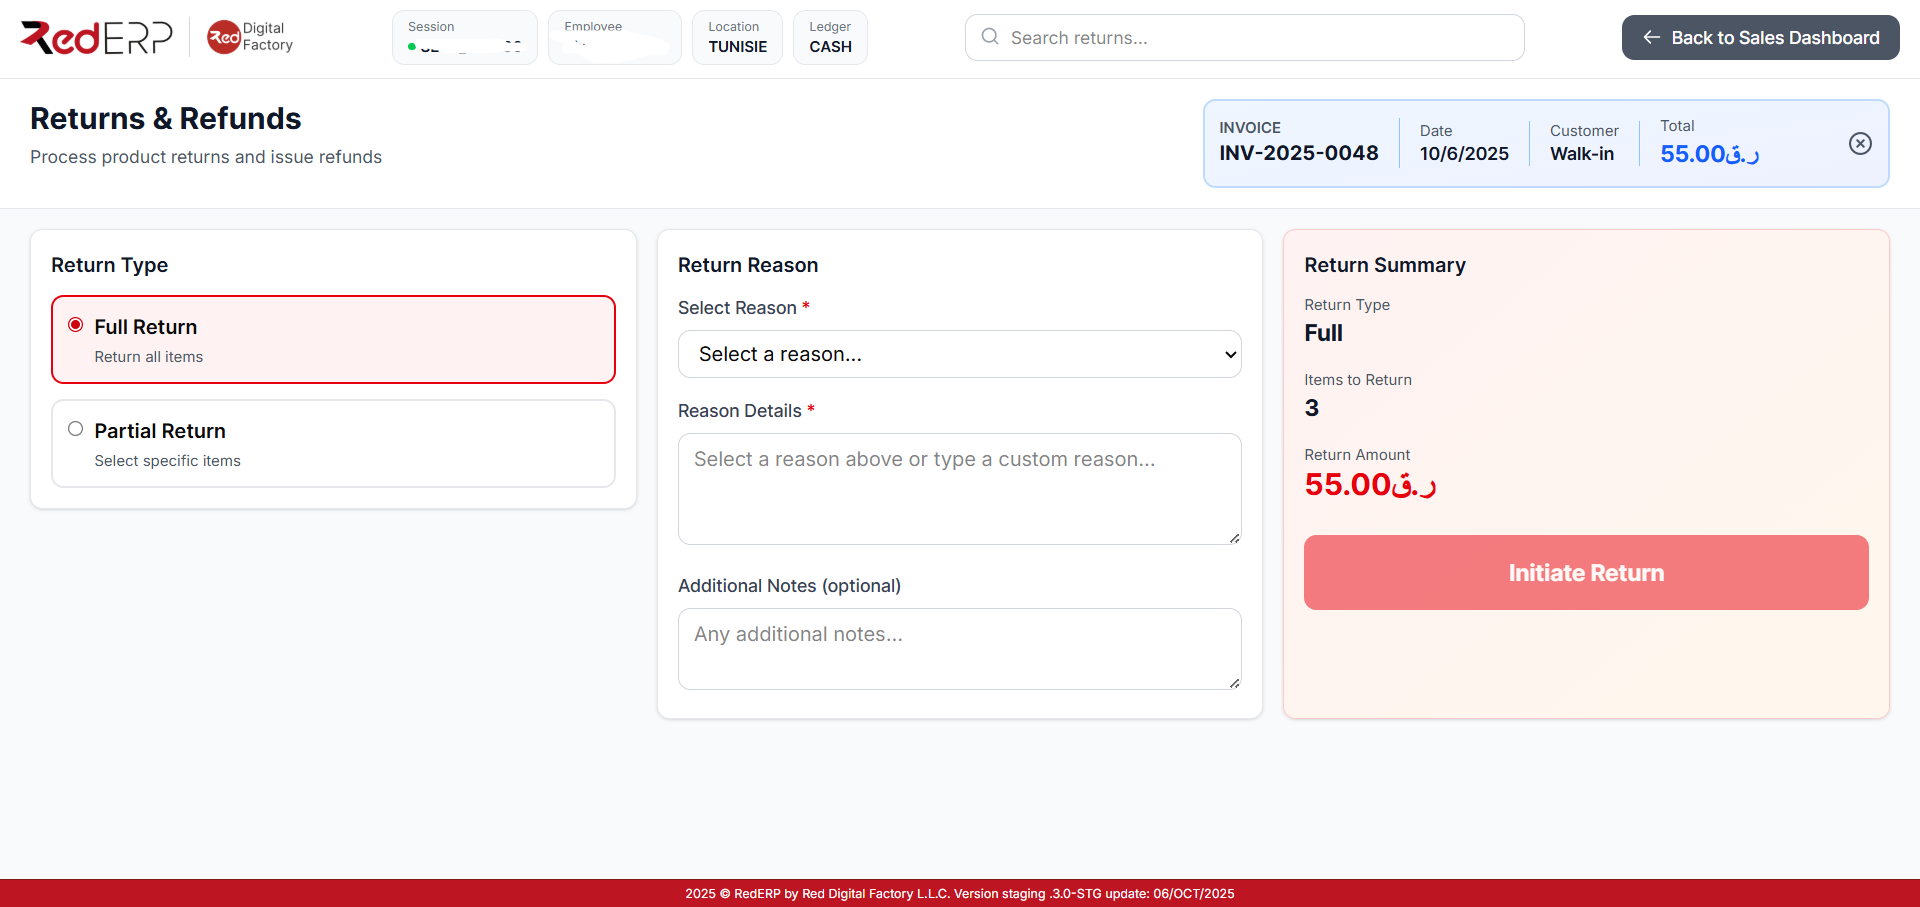
Choose:
- Full Return (return all items)
- Partial Return (select specific items)
- Return Reason and optional notes
Then click Initiate Return.
The request will appear in the Return Records list.
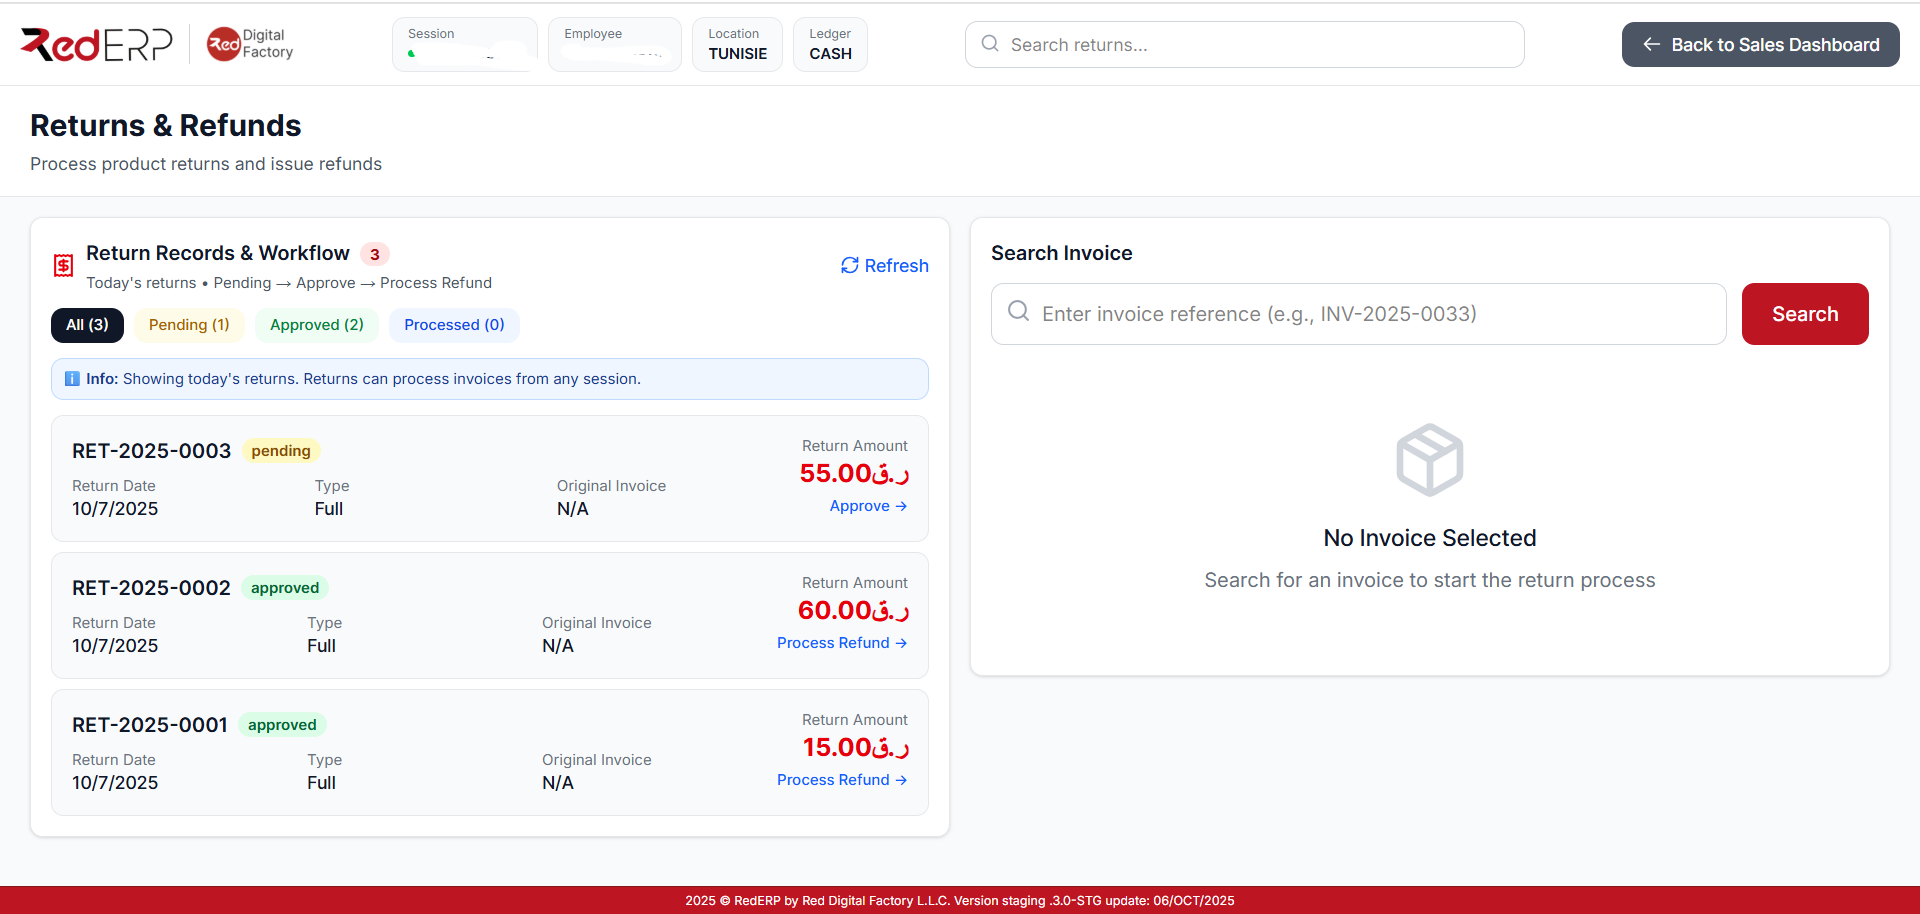
Managers can:
- Approve / Reject pending returns
- Once approved, select Refund Method and Process Refund
9. Session Reporting
Click Session Reporting in the sidebar to access session analytics.
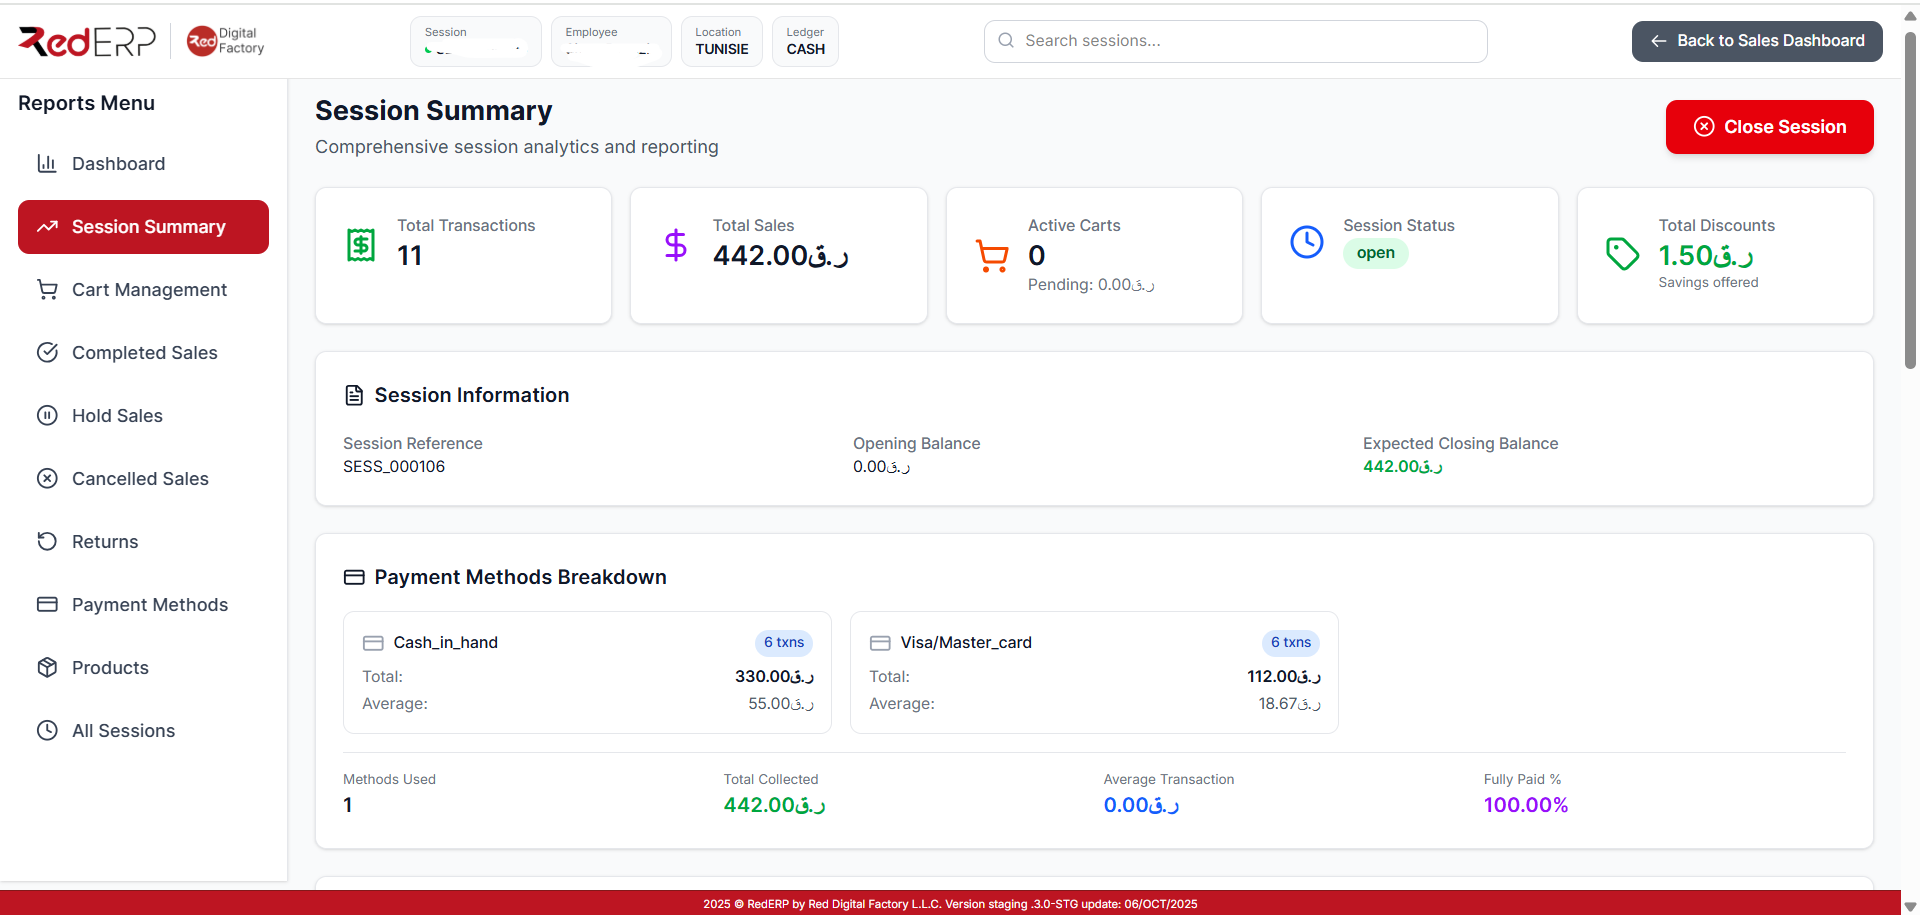
Here you can view:
- Total transactions and sales
- Payment method breakdowns
- Held and completed carts
- Product and invoice summaries
At the end of your shift, click Close Session to reconcile and generate the daily report.
10. Additional Reports
From Session Reporting, access detailed insights:
- Cart Management – Monitor all session carts
- Completed Sales – Paid and closed tickets
- On-Hold Sales – Paused transactions
- Cancelled Sales – Voided invoices
- Returns – Track refund activity
- Payment Methods – Analyze collection channels
- Products Report – Best sellers and total revenue
- All Sessions – Review performance across multiple sessions
11. Best Practices for Cashiers
| Situation | Recommended Action |
|---|---|
| Customer not ready | Use Hold Sale |
| Regular client | Assign client before payment |
| Mixed payment | Split between Cash & Card |
| Return required | Use Return / Refund |
| End of day | Close Session and review reports |
Quick Workflow Summary
- New Ticket → Select products
- Add to Cart → Adjust quantities
- Assign Client → Optional
- Payment → Choose method
- Complete Sale → Print receipt
- Hold / Resume → Manage pending tickets
- Return / Refund → Process returns if needed
- Session Reporting → Review and close session